Salted Caramel Apple Bars for Fall
Salted Caramel Apple Bars come to mind the moment the first cool breeze nudges me toward apples. I start picturing a pan of something cozy cooling on the counter, the kitchen smelling like cinnamon and butter, and a drizzle of glossy caramel catching the light. These salted caramel apple bars are exactly that feeling in dessert form.
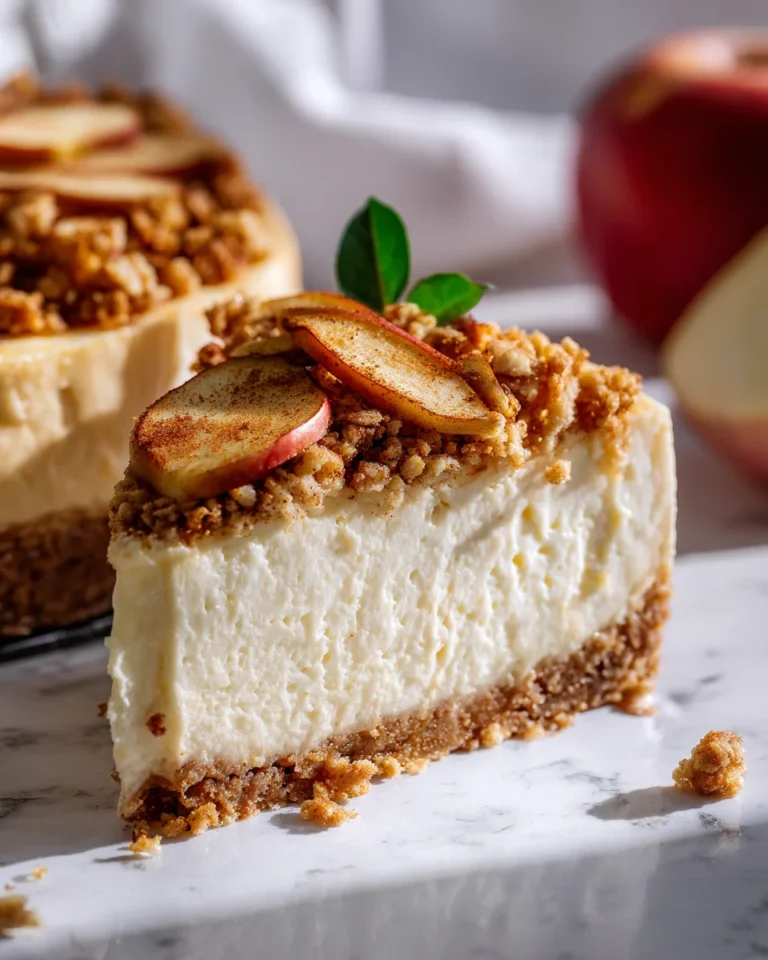
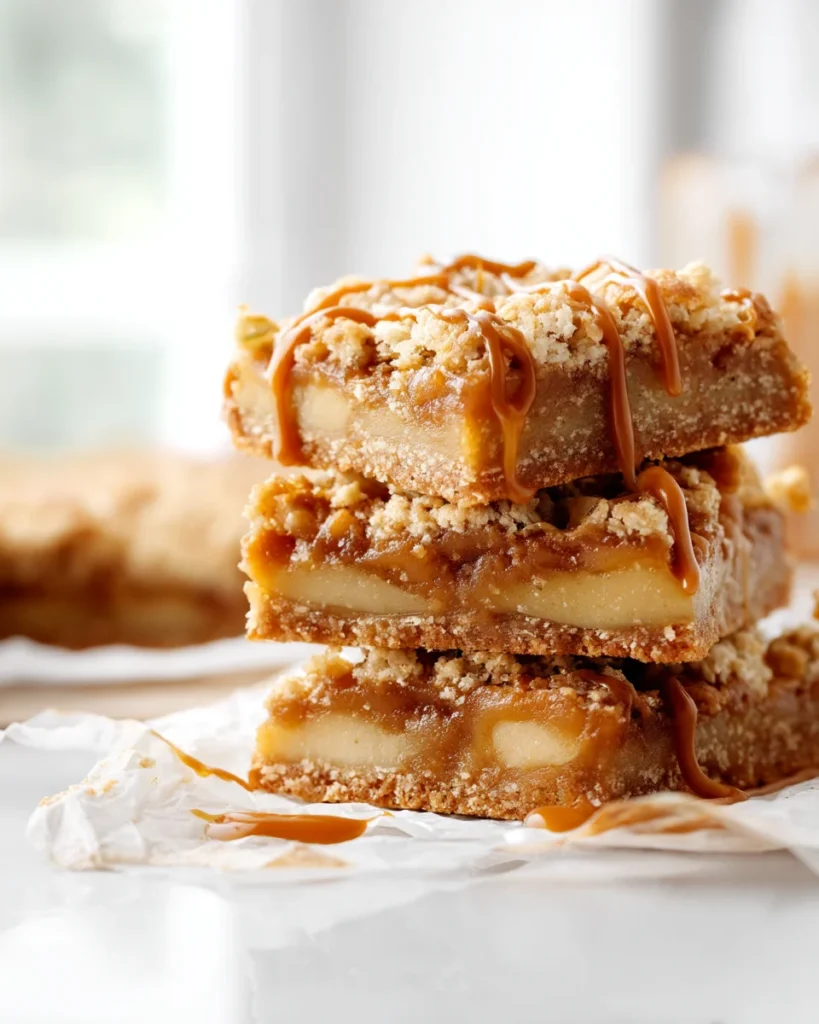
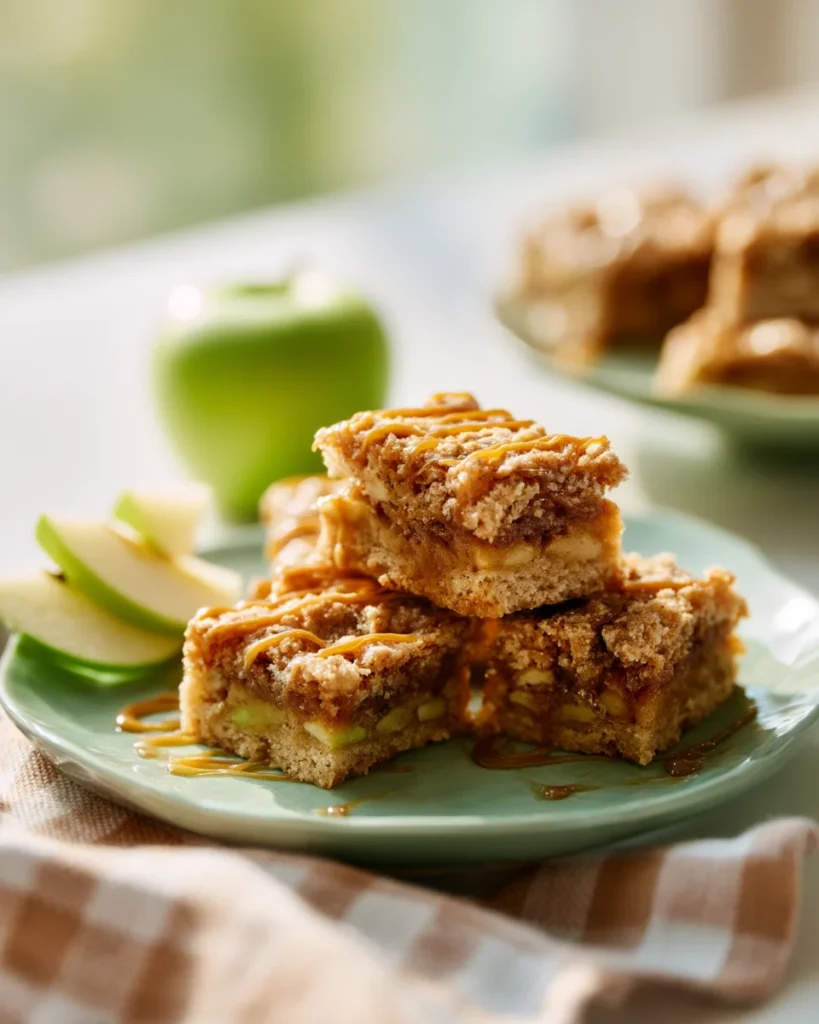
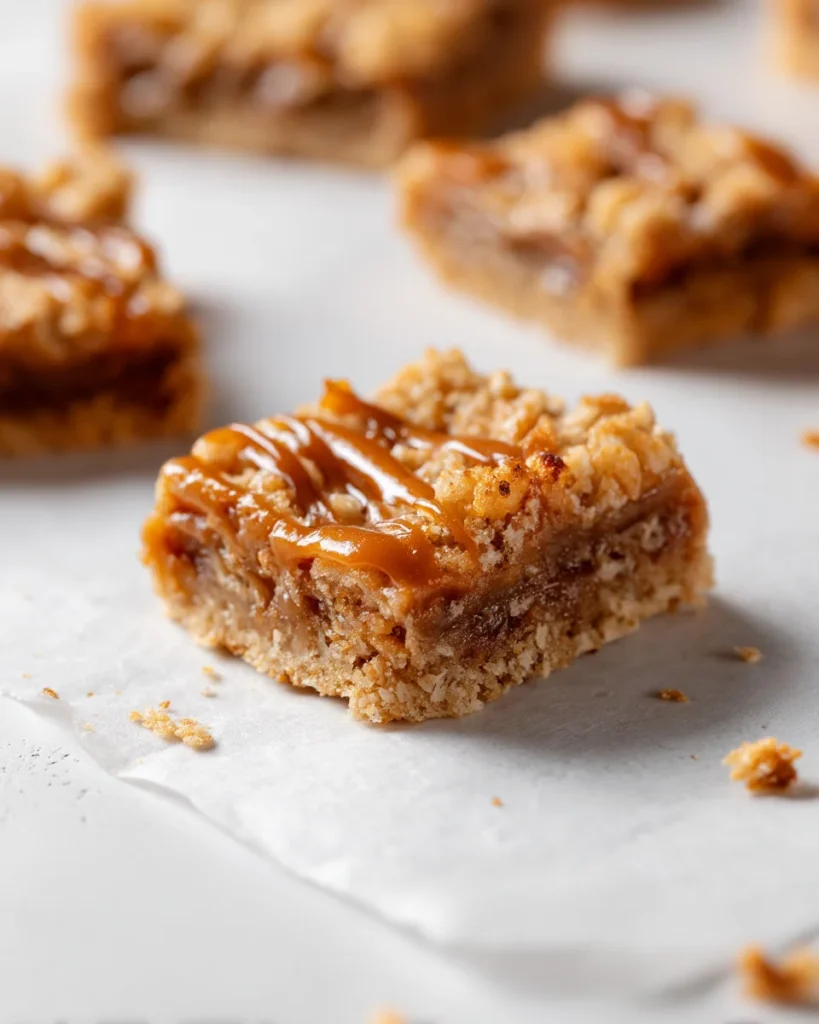
A sturdy brown sugar shortbread holds a juicy spiced apple layer, everything is tucked under a crisp oat crumb, and the whole thing is finished with a ribbon of salted caramel that settles into all the nooks. I cut them into generous squares and they disappear fast, sometimes before dinner, often with a cup of mint tea or milk. They are simple enough for a weekday, pretty enough for a fall gathering, and they slice like a dream once cooled. I make them whenever I come home with a bag of firm apples and the afternoon feels a little gray. Warm, golden, and fragrant, these bars make the house feel alive.
If you love bar desserts, try my no bake blueberry oat bars for a cool, fruit forward option.
Why You’ll Love This Recipe
Ingredients and Substitutions
I usually combine Granny Smith with Honeycrisp or Pink Lady. For more options and why they work, see this guide to the best apples for baking from King Arthur Baking
Directions
Prepping the Ingredients
I start by lining a nine inch square pan with parchment, leaving some overhang on two sides so I can lift out the bars later. I preheat the oven to three hundred fifty degrees Fahrenheit, about one hundred seventy five degrees Celsius.
The caramel should be ready before the bars go into the oven, because it needs a few minutes to thicken as it cools.
If I make it from scratch, I stir the sugar and water over medium heat until dissolved, then stop stirring and watch it carefully as it deepens in color. When it is a rich amber, I whisk in the butter, then the cream, and finish with vanilla and salt. I set the pan aside while I work so the caramel thickens to a perfect drizzling texture. If I am using a jar, I warm it very gently in a bowl of warm water until pourable.
For the apples, I peel and finely chop them into small cubes. I like pieces about the size of a chickpea, something that softens nicely but still holds shape. I toss the apples with brown sugar, cinnamon, nutmeg, cornstarch, salt, and lemon juice. The lemon keeps the apples bright, both in color and flavor. I let this mixture sit while I make the crust, which helps the spices bloom and the cornstarch start to cling.
Assembling and Baking
In a medium bowl, I whisk the melted butter with the brown sugar and vanilla, then stir in the flour and salt until no dry streaks remain. The dough will look like damp crumbs. I tip it into the lined pan and press it evenly into the corners with clean hands or the bottom of a measuring cup. It should feel firm and level. I slide the pan into the oven for about fifteen minutes. The goal is a set crust with a hint of golden color at the edges. This par bake keeps the base from getting soggy once the apples go on.
While the crust is in the oven, I stir together the crumb topping in the same bowl I used for the crust. Oats, flour, brown sugar, cinnamon, and a pinch of salt get tossed with melted butter until clumps form. I like to squeeze the mixture in my hand and let big clusters fall back into the bowl. Those chunky pieces bake into crunchy bites that look beautiful on top.
When the crust comes out, I work quickly so the layers marry together. I scatter the apple mixture evenly over the hot crust, drizzling any juices that collected in the bowl across the surface. Then I spoon about half of the salted caramel over the apples, zigzagging from edge to edge. The heat pulls the caramel downward so it nestles around the fruit. I finish with the crumb topping, sprinkling it evenly until the apples are mostly covered, with a few peeks here and there for glossy caramel to show.
The pan goes back into the oven for thirty to thirty five minutes. I look for bubbling at the edges, which tells me the juices are thickening, and a golden brown crumb. The scent of cinnamon and butter fills the kitchen. If the top looks done before the center bubbles, I tent a piece of parchment loosely over the pan so the crumb does not over brown. When it is ready, I set the pan on a rack and take a breath. This next step matters.
Final Touches and Slicing
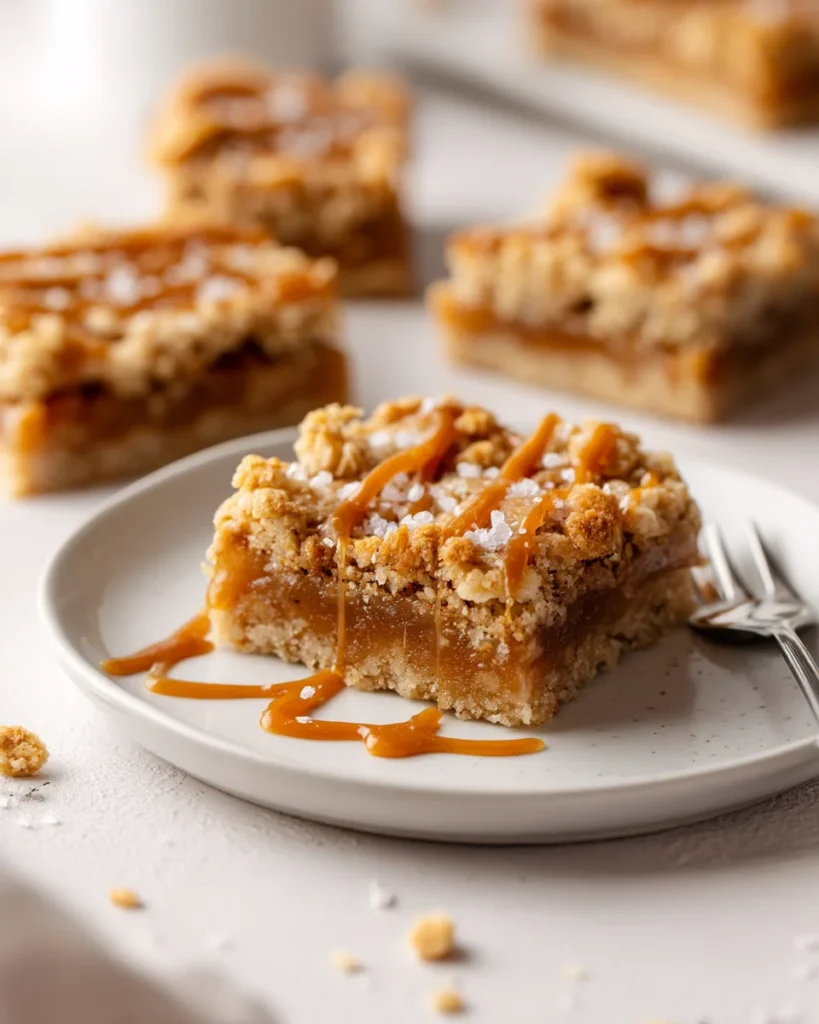
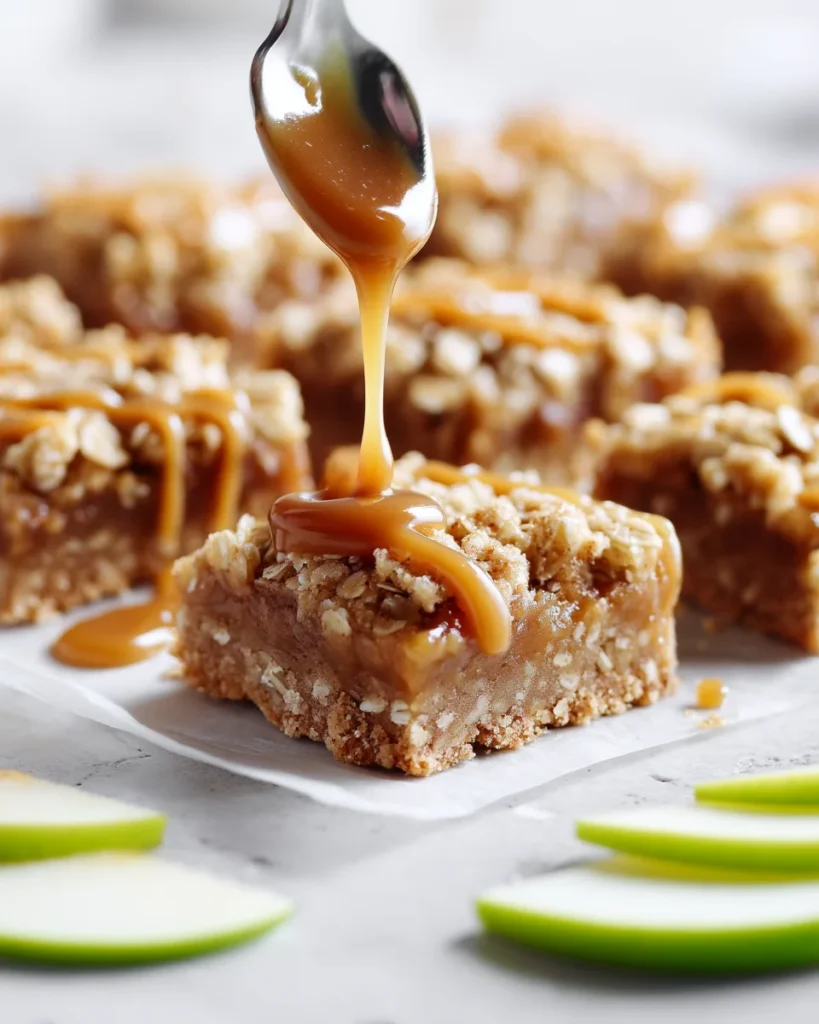
I let the bars cool to room temperature, about one to two hours. Warm bars are tempting, but cutting too soon will smudge the layers and the bars will slump. When the pan is just slightly warm, I drizzle most of the remaining caramel over the top, saving a little for serving. I sprinkle a pinch of flaky sea salt so it sticks to the warm caramel. Then I chill the pan for at least two hours. The chill firms everything, which is the secret to clean slices.
When I am ready to serve, I lift the whole slab out using the parchment overhang and set it on a board. I use a long sharp knife, wipe it between cuts, and slice into nine large squares or sixteen small ones. If I want a softer texture, I let the squares sit at room temperature for twenty minutes. If I am serving a crowd, I put the pan in the fridge in the morning and slice in the afternoon. The bars hold beautifully and the caramel keeps them moist.
Mistakes to Avoid
How I Like to Enjoy Salted Caramel Apple Bars for Fall
I love these bars slightly chilled with a drizzle of warm caramel and a sprinkle of flaky salt. The cool bar and warm sauce make a delicious contrast. If I am serving them for dessert, I add a spoon of lightly sweetened whipped cream or a small scoop of vanilla bean ice cream. The cold cream melts a little and mingles with the caramel, and the whole plate feels just right on a crisp evening.
For a cozy weekend moment, I pair a square with hot mint tea or cinnamon milk. The spice in the drink echoes the cinnamon in the bars and turns a simple snack into a little ritual. If we are having friends for a fall dinner, I cut the bars into smaller bites and set them out on a platter with apple slices and grapes for a simple dessert board. Everyone can drizzle their own caramel and add a pinch of salt.
On busy school nights, I tuck a small square into lunch boxes. The bars travel well and do not crumble if they are chilled before packing. For brunch, I slice them into thin rectangles and serve with yogurt and honey for a sweet finish. They also fit late afternoon moods, when the sun sits low and a warm kitchen sounds nicer than any cafe.
If you bake these, I hope your kitchen smells like fall and someone wanders in to ask what is in the oven. These bars invite that kind of conversation, the small moments that make home baking feel so good.
Variations You’ll Love
Tips for Better Results
Salted Caramel Apple Bars for Fall
Buttery brown sugar shortbread, tender spiced apples, and a crisp oat crumb. A slow drizzle of salted caramel brings it all together. These slice cleanly, travel well, and taste like the best fall festival treat in bar form.
Ingredients
- Crust
- 1 cup unsalted butter, melted, 226 g
- 1/2 cup packed light brown sugar, 100 g
- 1 tsp vanilla bean paste or alcohol free vanilla
- 1/4 tsp fine sea salt
- 2 cups all purpose flour, 250 g
- 1 to 2 tsp milk only if dough seems dusty
- Apple filling
- 4 cups peeled and finely diced apples, about 4 medium, mix of tart and sweet
- 1/3 cup packed light brown sugar, 65 g
- 2 tbsp cornstarch or arrowroot
- 2 tsp ground cinnamon
- 1/4 tsp ground nutmeg
- 1 tbsp fresh lemon juice
- Pinch fine sea salt
- Oat crumb
- 1 cup old fashioned rolled oats, 100 g
- 3/4 cup all purpose flour, 94 g
- 1/3 cup packed light brown sugar, 67 g
- 1/2 tsp ground cinnamon
- Pinch fine sea salt
- 6 tbsp unsalted butter, melted, 85 g
- Salted caramel
- 1 cup granulated sugar, 200 g
- 1/4 cup water
- 6 tbsp unsalted butter, 85 g, room temperature
- 1/2 cup heavy cream, 120 ml, room temperature
- 1 tsp vanilla bean paste or alcohol free vanilla
- 1 tsp flaky sea salt, plus more for sprinkling
- or use 3/4 to 1 cup thick store bought salted caramel sauce
Instructions
- Line a 9 inch square pan with parchment, leaving overhang. Heat oven to 350°F, 175°C.
- Make caramel first so it can thicken. In a light colored saucepan combine sugar and water. Cook over medium heat without stirring until deep amber. Off heat whisk in butter, then cream. Stir in vanilla and salt. Set aside to cool until thick but pourable.
- For the crust, whisk melted butter, brown sugar, vanilla, and salt. Stir in flour until no dry streaks remain. If very crumbly, add a teaspoon of milk. Press evenly into the pan. Par bake 15 minutes until set at the edges.
- While the crust bakes, mix the apple filling. Toss diced apples with brown sugar, cornstarch, cinnamon, nutmeg, lemon juice, and a pinch of salt.
- Make the oat crumb. Combine oats, flour, brown sugar, cinnamon, and salt. Stir in melted butter until clumps form.
- Assemble. Spread the apple mixture over the hot crust. Drizzle about half of the caramel over the apples. Sprinkle the crumb evenly on top.
- Bake 30 to 35 minutes, until the edges bubble and the crumb is golden. If the top browns too fast, tent loosely with parchment.
- Cool the pan on a rack until just warm, 60 to 90 minutes. Drizzle most of the remaining caramel over the top and sprinkle a little flaky salt.
- Chill at least 2 hours to set.
- Lift out with the parchment. Cut into 16 squares with a sharp knife, wiping between cuts. Serve with the last spoonful of caramel if you like.
Notes
FAQs
Can I make these ahead of time?
Yes. I like to bake the bars the day before, cool them to room temperature, then chill the whole pan until firm. Right before serving, I drizzle on fresh warm caramel so it looks glossy. Chilled, the bars keep well for up to 5 days. For longer storage, slice and freeze the bars well wrapped for up to 2 months, then thaw in the fridge and add a fresh drizzle of caramel.
What apples work best?
I get the best flavor and structure from a mix of tart and sweet apples. Granny Smith for brightness and shape, plus Honeycrisp or Pink Lady for juicy sweetness. Dice the apples small so they soften evenly and slice cleanly. Very soft apples like McIntosh can turn mushy, so I save those for applesauce.
Can I use store bought caramel instead of homemade?
Absolutely. Choose a thick, spoonable caramel sauce, not a thin topping. Warm it gently until it pours in slow ribbons, then drizzle. If the jarred caramel tastes very sweet, finish the bars with a pinch of flaky sea salt to balance everything.
How can I get clean slices and keep the crumb crisp?
Par bake the crust, let the finished pan cool to room temperature, then chill until firm. Use a long sharp knife and wipe between cuts. When adding the crumb, leave a few small gaps so steam can escape, which helps the topping stay toasty. If you want extra crunch, drizzle most of the caramel after slicing instead of before chilling.